
Step-by-Step Home Maintenance Checklist to Power Wash First
- Dec 19, 2024
- 9 min read
Updated: Jan 14
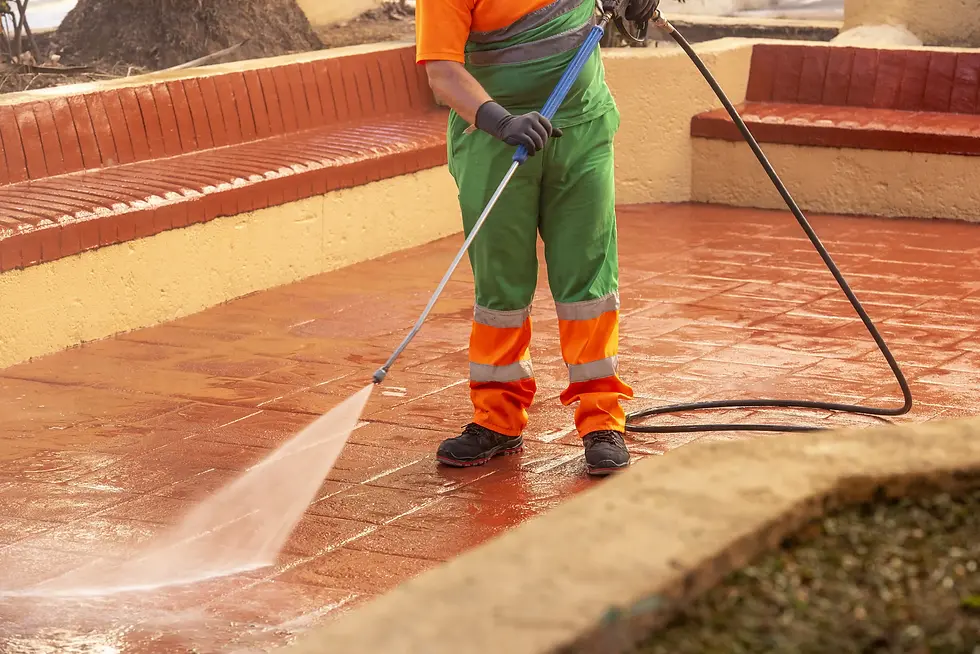
![Power washing home exterior: Step-by-step maintenance checklist for a clean house in [Your City]](https://static.wixstatic.com/media/54ed9d_6533f0a40b4442b3908c9c95058b091e~mv2.png/v1/fill/w_687,h_439,al_c,q_85,enc_avif,quality_auto/54ed9d_6533f0a40b4442b3908c9c95058b091e~mv2.png)
Keeping your home’s exterior clean and well-maintained is easier with a clear plan, especially when power washing is involved.
Many homeowners ask what to power wash first and whether it’s safe to do it themselves. The answer depends on the surface, the pressure used, and the condition of your home.
This maintenance checklist for power washing helps you decide what to clean first, which areas need low-pressure soft washing, and what surfaces should never be power washed at all.
It also highlights basic safety tips, pressure considerations by surface, and when hiring a professional, can help prevent costly damage.
By following the right order and using the correct approach, you can protect your home’s exterior, improve curb appeal, and avoid common power washing mistakes.
Why You Need a Maintenance Checklist to Power Wash?
Using a maintenance checklist to power wash helps you know what to clean first and how to clean each surface safely.
It keeps you from using too much pressure and helps protect siding, roofing, decks, and concrete from damage.
Dirt, mold, and grime build up on outdoor surfaces over time, making them look old and dull.
Power washing removes these and protects your property while improving curb appeal. It also helps surfaces stay ready for painting, sealing, or staining.
Before you spray anything, do a quick setup so you don’t create streaks, leaks, or water intrusion.
In Morris County, we’ve cleaned everything from single-family homes to commercial properties across towns like Morristown, Parsippany, Mendham, and Randolph.
A checklist matters because exterior cleaning is not ‘one setting fits all’ with different materials (shingles, vinyl siding, wood, concrete) needing different methods to avoid damage and get lasting results.
Do this first:
Walk the perimeter and look for loose siding pieces, cracked caulk, rotted wood, or open soffits (water can get behind surfaces).
Cover exterior outlets, doorbell cameras, and light fixtures with plastic.
Pre-wet nearby plants and lightly cover delicate landscaping (cleaners can stress plants).
Choose the right approach: for many surfaces, soft washing (low pressure + cleaner) is safer than blasting with high PSI.
Example: If you have one loose vinyl siding panel, a strong spray can push water behind it and trap moisture. Fixing that panel first prevents future mold/rot issues.
If you’re new to exterior cleaning, this checklist also works as a power washing guide for beginner homeowners, helping you understand where to start, how much pressure to use, and which areas require extra caution.
Instead of guessing or jumping between surfaces, the checklist gives you a clear, safe order to follow.
Step 1: Start With the Roof (But Don’t “Power Wash” It)
The roof comes first because everything rinses downward. If you wash siding first, roof runoff can re-stain it.
Most asphalt shingle roofs should not be pressure washed, it can strip protective granules and shorten roof life. Soft washing is the safer, common method.
What we see a lot in Morris County, those dark roof streaks are usually algae growth that needs the right treatment, not more pressure.
At Burrini’s Powerwashing, roof cleaning is handled with a low-pressure soft wash system designed to clear stains and kill growth without harming shingles.
What to do:
Confirm roof type: asphalt shingles, metal, tile. Each behaves differently.
If it’s asphalt shingles, use soft wash (low pressure) and let the cleaner do the work.
Remove loose debris (branches/leaves) with a blower or gentle tool first.
Common homeowner mistake: Spraying upward under shingles or using high pressure can force water under materials and damage edges.
Example: A homeowner sees dark streaks (algae) and hits it with high pressure. It looks clean for a month, but the shingles start looking “bald” in spots, that is granule loss. Soft washing prevents that.
When it comes to pressure washing a roof shingles, more pressure is not better. In fact, using high PSI on shingles often causes more harm than good.
That’s why low-pressure soft washing is the recommended approach for removing algae and streaks without damaging the roof surface.
Step 2: Clean the Gutters (Clear First, Then Rinse)
Gutters come next because roof cleaning (and rain) will keep feeding them debris.
What to do:
Clear solids first (leaves, sludge). Power washing alone can turn packed debris into a mess.
Flush the gutter run toward downspouts.
Flush downspouts last so you confirm drainage.
What to check while you clean:
Look for dripping seams, sagging sections, and overflow spots (these cause fascia rot).
If overflow happens even after cleaning, your downspout may be clogged underground.
Example: If you rinse gutters and water pours over the front edge, you may have a hidden clog at the downspout elbow. Clearing that now prevents water from dumping near your foundation during the next storm.
Step 3: Wash the Siding (Use Soft-Wash Logic, Not “Max PSI”)
Siding is where a lot of DIY damage happens: water intrusion behind panels, stripped paint, dented vinyl.
Manufacturer-style guidance often recommends gentle washing (hose + soft brush) for vinyl, and warns against overly aggressive methods. Also, many pros rely on soft washing for safer results.
We don’t treat siding like a one-size-fits-all job. Burrini’s Powerwshing tailors the approach to the surface so you get a deep clean without forcing water behind panels or damaging finishes.
What to do (safe process):
Pre-rinse the section.
Apply cleaner from bottom to top (prevents streaks).
Let it dwell briefly (don’t let it dry).
Rinse from top to bottom.
Distance and angle:
Keep the spray angled downward, not upward (upward spray is how water gets behind siding).
Start farther back and move in only if needed.
Example: North-facing siding has green algae in shaded areas. Soft washing removes it evenly. High pressure might remove it fast but can leave “zebra marks” or push water behind seams.
Step 4: Refresh the Driveway + Walkways (Surface Cleaner = Even Results)
Flatwork is ideal for pressure washing, but it’s also where people create “wand lines” and uneven striping.
What to do:
Sweep first (sand and grit can etch surfaces).
Use a surface cleaner attachment for consistent, professional-looking results.
Pre-treat oil spots with a degreaser and give it dwell time.
Don’t do this:
Don’t hover in one spot, concrete can show etched circles or bright spots.
Don’t blast cracked areas aggressively; you can worsen the spalling.
Example: A driveway has two dark oil spots near the garage. If you only pressure wash, they’ll lighten but still show. Pre-treat + dwell time makes the difference.
Step 5: Wash the Deck or Patio (Match the Method to the Material)
Decks are where PSI really matters. Wood can fuzz, splinter, or get “tiger stripes” if pressure is too high.
Pressure washing a deck requires extra care because wood reacts differently than concrete or stone.
Using the wrong pressure or spraying too close can damage the surface, making proper settings, distance, and technique just as important as the cleaning itself.
A common safe range for wood decks is around 1,500–2,000 PSI, used carefully with the right tip and distance.
What to do
Identify deck type: wood vs composite vs pavers vs concrete patio
For wood:
Use lower pressure and a wider fan tip.
Spray with the grain, steady pace.
Let it fully dry before staining/sealing.
Example: An older wood deck looks gray. If you blast it, the “soft spring wood” lifts and turns fuzzy. A gentler wash + proper cleaner keeps the boards smooth and stain-ready.
Step 6: Tackle Outdoor Furniture (Test a Hidden Spot First)
Furniture is easy to clean, but it’s also easy to damage: chipped paint, shredded fabric, forced water into joints.
What to do:
Test spray on a hidden area first.
Use a wider fan tip and back up your distance.
Cushions: use mild detergent + rinse, don’t blast seams.
Example: Wicker-style resin furniture can trap grime in texture. A gentle wash plus a soft brush works better than trying to “power” grime out.
Step 7: Clean Fences + Gates (Work in Small Sections)
Fences streak badly when the cleaner dries unevenly.
What to do:
Identify material:
Wood: lower pressure, more distance.
Vinyl/metal: usually tolerates more, but don’t strip paint.
Apply cleaner → short dwell → rinse before it dries.
Work top to bottom.
Example: A wood fence has green buildup near the bottom from sprinkler spray. You get better results treating that lower band with cleaner first, then rinsing evenly across the whole panel.
Step 8: Brighten Windows + Screens (Gentle Only — or Skip the Washer)
Windows are a high-risk area because pressure can damage seals, force water inside, or even crack glass. Most consumer guidance recommends caution and low pressure around windows.
What to do:
Screens: remove and rinse gently with a hose (better than a pressure washer).
Windows: use a gentle rinse, then finish with a squeegee method for truly streak-free results.
Avoid: Spraying directly into edges, frames, weep holes, or seals.
Example: A homeowner power-washes window frames and later sees fogging between panes. That’s often a failed seal—pressure around edges can contribute to problems.
Step 9: Finish With the Garage Door (Big Visual Payoff)
Garage doors are a “curb appeal multiplier” and they collect grime in corners, trim, and lower panels.
What to do:
Pre-rinse.
Apply cleaner evenly (especially the bottom 12–18 inches).
Rinse thoroughly and don’t forget the side trim.
Example: If your driveway is clean but the garage door is still dull, the whole front of the home still looks “unfinished.” Doing this last makes the whole project feel complete.
When ladders are involved, follow the three points of contact rule (two hands + one foot, or two feet + one hand).
Also avoid pressure washing while standing on a ladder, kickback and loss of balance are common hazards.
What’s the Difference between Power Washing vs Soft Washing?
Not every surface should be cleaned the same way. One of the biggest mistakes homeowners make is using high pressure where a gentler approach works better.
Power washing uses higher pressure to remove heavy dirt and buildup from durable surfaces like concrete driveways and walkways.
Soft washing uses low pressure combined with cleaning solutions to safely remove organic growth from more delicate surfaces.
When power washing works best:
Concrete driveways and sidewalks
Stone patios and pavers
Garage floors and durable masonry
When soft washing is the safer choice:
Roofs (especially asphalt shingles)
Vinyl and painted siding
Decks, fences, and outdoor furniture
Using the right method protects surfaces while delivering longer-lasting results.
Material-Specific Risks Homeowners Should Know
Every exterior surface reacts differently to pressure and water. Knowing the risks helps you avoid costly damage.
Concrete: Too much pressure or staying in one spot can etch the surface and leave visible marks.
Wood decks and fences: High PSI can splinter wood, raise grain, and leave a rough texture that requires sanding.
Vinyl siding: Spraying upward or using excessive pressure can force water behind panels.
Asphalt shingle roofs: Pressure washing can strip protective granules and shorten roof lifespan.
Understanding these risks is why following a proper cleaning order and method matters.
Do Not Power Wash These First (or at All)
Before starting, it’s important to know what should not be power washed, or should only be cleaned using low pressure.
Avoid power washing:
Asphalt shingle roofs (use soft washing instead)
Older or damaged siding
Windows, screens, and seals
Painted wood surfaces showing peeling or cracks
Outdoor light fixtures and electrical components
If a surface already shows signs of wear or damage, high pressure can make the problem worse.
For these areas, soft washing services are often the safer option. Soft washing uses low pressure combined with appropriate cleaning solutions to remove algae, mold, and grime without stressing the surface.
This is the method Burrini’s Power Washing relies on for roofs, siding, and other delicate exterior materials where pressure washing would be too aggressive.
Refresh Your Home and Book a Power Wash Today
Power washing is one of the most effective ways to protect your home’s exterior and keep it looking its best.
By following this step-by-step checklist, you can clean in the right order, avoid common mistakes, and reduce the risk of surface damage or water intrusion.
Burrini’s Power Washing has been a trusted name in exterior cleaning across Morris County for over 50 years.
Many of our customers come through referrals because our focus is not just on making surfaces look clean, but on cleaning them safely and helping them stay in good condition longer.
We provide professional power washing services throughout Randolph, Morristown, Mendham, Denville, and surrounding New Jersey communities, using the right methods for each surface and property type.
Get a free quote today and let our experienced team help refresh your home with safe, reliable exterior cleaning.
Frequently Asked Questions
Can I do power washing myself, or should I hire a professional?
You can handle small, durable areas like concrete if you use the right pressure and technique. For roofs, siding, decks, or older surfaces, hiring a professional helps reduce the risk of damage and safety issues.
What should never be power washed around a home?
Asphalt shingle roofs, windows, older or damaged siding, peeling painted wood, and electrical components should not be power washed with high pressure. These areas are safer to clean using low-pressure or soft washing methods.
How often should a home be power washed?
Most homes benefit from exterior power washing once a year to remove buildup and maintain curb appeal. High-traffic areas may need more frequent cleaning, while roofs and siding typically require gentler, less frequent care.


Comments